Thursday 25 December 2014

Happy Christmas

This will be my last post for a short time.  Thank you for checking my blog out to see what I have been up to, and thank you too for your comments and encouragement during the year.  I hope you all enjoy your Christmas break, enjoy the company of family and friends and stay safe.  We will be spending the day with Greg's family and then later will hopefully be able to catch up with all my family.  Fingers crossed they all can make it. 

This is what our family Christmas card looked like this year.  Instead of trying to be stunning with a touch of wow (which I don't always achieve), our cards were whimsical and fun.  Poor old Santa will be glad of a rest after all that spinning.  The collective photos were taken at night after I realised I had better photograph them before being popped into envelopes, the others during the day so much better colour representation. 


To those of you who received a card from us, remember they are worth at least 10 cents.  Make sure you rescue those two 5 cent coins before throwing it away.  You may just need 10 cents one day!

HAPPY CHRISTMAS.

Tuesday 23 December 2014

Christmas gift boxes

I had to have last week off as I was still working on my Christmas cards and HAD to finish them before doing much else, so hence the lack of posts last week.  Now that the cards have been posted, I can show you what I have been making lately.  

These little boxes were for the ladies I work with, and they each had a little candle inside.  The original idea was another one of Michelle Le Breton's - she comes up with some clever things.  


The boxes were made using the Gift Box Punch Board, stamped and heat embossed with white powder, a bow was tied using the beautiful Red Satin Woven Ribbon and a label from Label Love.  A simple idea, but very pretty. 

Monday 22 December 2014

Apologies

I/m running a bit late.  I'll be back sometime tomorrow. 

Thursday 11 December 2014

Many Merry Stars Simply Created Kit

As promised, two of the boxes made from the Many Merry Stars Simply Created Kit.  

Michelle is a fan of this kit and loved all the little boxes that could be made.  I wasn't quite convinced, but I do love the ones I did get to make.  I just can't imagine what I would do with 26 stars around the house.  But it would be a good kit to share with a friend or two.  


Some of the boxes come with little trapdoors in the back so you can pop in a present or a couple of chocolates, and Michelle showed us how to create our own little opening for the ones that didn't. 


Tuesday 9 December 2014

More Christmas Cards

I recently went to another class with Michelle Le Breton and thought you might like to see what we made.  I really enjoy going to classes where everything is all thought out for you, no decisions need to be made, and everything is pre-cut as well.  So you just have the chance to relax, chat a little and copy the samples.  It's also a chance to use products that you don't have and occasionally, for me anyway, it makes me change my opinion of what I thought of them when I first saw them in the catalogue. 

Michelle's first card was made with the Under the Tree papers and Get your Santa On set.  Quite a simple design, but it looks great.   


Next up we got to use the Tree Punch and more Under the Tree DSP with an alphabet die set. 


The last card was my favourite, which uses the Stars Framelits and Many Merry Stars set, along with a mask using the Confetti punch.  


On Thursday I will let you see the boxes we made using the Many Merry Stars kit.

Thursday 4 December 2014

Turquoise Feathers

And here's my second Turquoise card for the week.

My stamping buddy let me borrow her Four Feathers stamp set for a while and so I decided to use it on the card for my sister's birthday tomorrow.  I actually cut into a piece of 12 x 12 DSP to make the card.  Big deal, you think, but there are some of us who find it very hard to use papers on their cards - I'm not sure whether it's because every time I cut a piece off, the card looks crap, and I end up throwing it out or what, but this time it actually resulted in a card which I am quite happy with.   The white border around the edges just set it off nicely, and so I continued with the white and embossed a couple of the feathers and then added string and a button. 


Even the inside got the treatment.   I just hope it gets through the mail OK as it was a bit bulky where the button was.  Happy Birthday R.


Tuesday 2 December 2014

A week of Turquoise

I have recently bought a Tempting Turquoise ink pad and cardstock, and this is going to be my "go to" colour this week.   Not sure why it took me so long to add it to my collection, but I'm quite glad I have now.  It's a beautiful bright bluey colour and very summery, in my opinion.

The card below was made for a friend's birthday with another new purchase, an old Stampin' Up set called "Petal Prints" from about 2008 which I picked up on a website that sells off retired sets.  I don't know why I needed to have it, but it just appealed to me at the time. 


Thursday 27 November 2014

Thank you cards

Haven't much to show lately, but these are a few little thank you cards made for recent orders.  


These ones were made with the Scalloped Tag Topper punch, which has more than paid for itself since I bought it.


The last two were packaged for me by a friend - great idea to use a doily - and I just stamped off the heart shape from Hearts a Flutter to finish it off. 

Tuesday 25 November 2014

My birthday cards

I celebrated my birthday recently and wanted to show off a few of the cards I got.  I am so fortunate to have friends that send me handmade cards.  Everyone has their own styles and ideas, and it's great to be able to see these.  In no particular order, here they are. 


 The last one is from my hubbie - every year he makes me a card on the computer.  Sweet!

Thursday 20 November 2014

A jump on the bandwagon

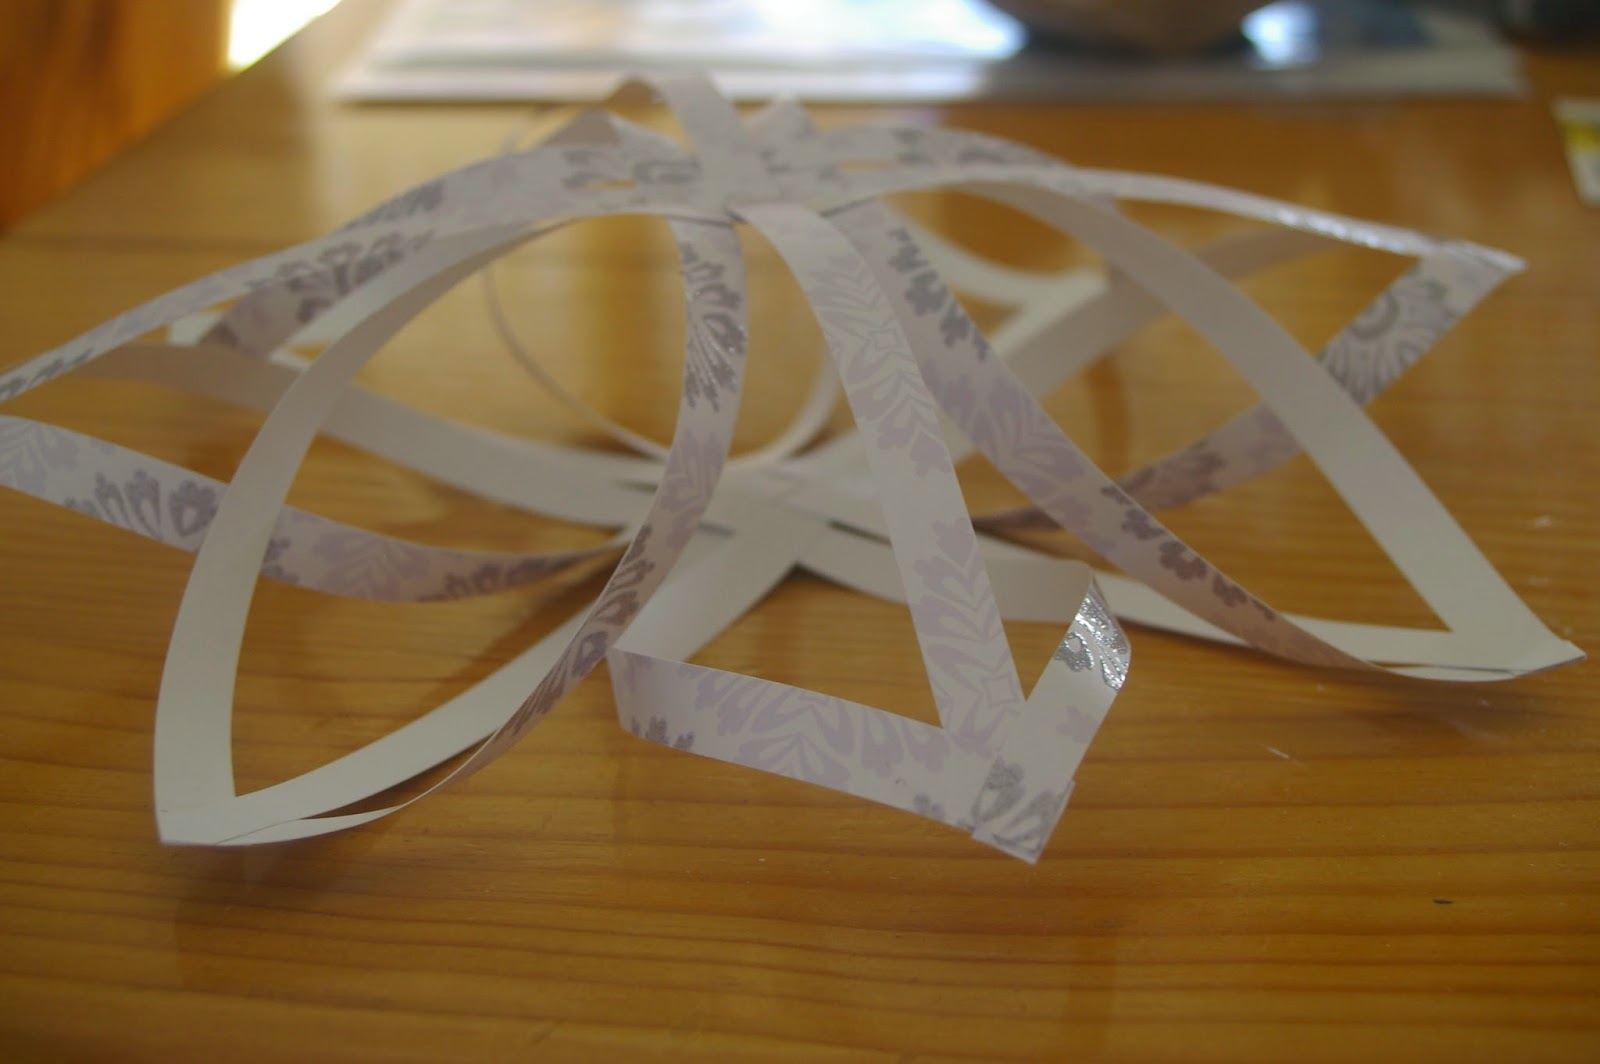
The latest trend at the moment seems to be Finnish/woven stars.  I have seen so many lately in various sizes and colours that I just had to have a try too.  

My first attempt ended up in the bin as I joined the two half the wrong way around.  

And this is the second attempt.  The first one I made I used 6 inch strips, but this one I did them 12 inch strips.  The larger size was easier to manipulate, but I much prefer the smaller size and thicker paper would have been better - this one was a little flimsy.  


Like to have a try yourself?  Here's the link.   homemade-gifts-made-easy  Don't forget to turn over the piece once you have all 6 strips in place.  That's where I went wrong on my first one.  Love to hear (or see) how yours turns out.  

Tuesday 18 November 2014

A very green birthday

This is a card made for another lover of green - there are a few of them out there that I know.  Made with stamps from my very neglected "Kinda Eclectic" set.  I seem to struggle with this one as, like the name implies, it doesn't really go together for me.  Still, I hope the birthday lady was happy with it. 

The true colour of the green is more like that in the second photo.  


Thursday 13 November 2014

My big sister's birthday

My sister recently celebrated her ?? birthday and as she is a very talented quilter and lover of purple I always try to incorporate those things in my card for her.  She also loves Betty Boop, so when I saw this card by Miechelle I had to try to CASE it for her.  

Even thought I had plenty of time to make this, I ended up running out of time and needed to send it off quickly, so it ended up not a card, but just a sheet of cardstock she could use for .....???? a bookmark.  Not sure what really. 


 Fortunately I had previously made this card up for her before Betty showed up, so I sent this one off as well.  Not great, but it did fit the purple colour scheme. 


Tuesday 11 November 2014

An anniversary card

I was asked to make a card for a 30th Anniversary recently and here I what I ended up with.  This was one of the first times I got to use the numbers on my new Memorable Moments set.  I have thought I needed this set for a long time before I actually got around to buying it, and it makes such a difference on this card.  The numbers are just beautiful whether they are just stamped or, even better, embossed in silver or gold.  It's a little tricky lining everything up and getting the spacing right, but after lots of practice stamps I think I got it right. 


The card is a Tri-fold card and cardstock Elegant Eggplant.  I just love that swirly stamp.  

Thursday 6 November 2014

The last of the oldies - for a while at least

Well here's another card for those people who are prepared to put in a little more effort.  Once again you have to pull out the stamp-a-ma-jig to get this one looking OK.  Each time you stamp, you have to line everything up to make sure it all looks even, and most rows involve two goes at stamping too.  BUT if you get it right, it does look good.  I stuffed up towards the bottom, but overall I was quite pleased with the way it turned out.  Probably easier to print it out on a computer though. 


And to finish, a shaker card.  I remembered to put the clear window sheet in this time.  


Tuesday 4 November 2014

A few more retired oldies


I love how this card turned out - there's something about the use of vellum to soften an image.  I pull this stamp set out every so often but a stamp-a-ma-jig is essentially to use to make sure everything lines up properly.  The roses have been stamped onto white, overlayed with vellum and then tucked into real red cardstock with two thirds of the front section "torn" away.  I stamped the greeting onto the vellum to keep it in the forefront of the card.  

A little bit fiddly, but well worth the effort.


After I had stamped out the image on this card below it still looked a little "unfinished even with the butterflies, so I grabbed the scoring board and created the border around the edges.  Much better, don't you think?